Boat lifts are an essential addition for many waterfront property owners. They protect vessels from water damage, reduce maintenance costs, and make launching and docking easier. However, many clients and contractors ask the same question: how is a boat lift installed?
This guide breaks down the boat lift installation steps in detail from planning and permitting to final testing so you can better understand what goes into a successful project.
Why Proper Boat Lift Installation Matters
A poorly installed boat lift can lead to safety risks, structural failures, or costly repairs. Proper installation ensures:
- Longevity: Extends the lifespan of the lift and the boat itself
- Safety: Reduces the risk of accidents during lifting or docking
- Performance: Ensures smooth, reliable operation
- Compliance: Meets local building and environmental regulations
Step 1: Site Assessment
Every installation begins with a comprehensive site evaluation. Contractors assess:
- Water depth and tidal variations
- Soil or seabed conditions (mud, sand, rock)
- Wave and wind exposure
- Boat specifications (weight, size, draft)
- Dock structure compatibility
This step determines the right lift type (cantilever, vertical, hydraulic, floating, or pile mounted).
Step 2: Design Planning
After site evaluation, the project moves into design planning.
Key design considerations include:
- Lift capacity: Ensuring it supports the boat’s full weight
- Dock integration: Attaching or aligning with existing docks
- Lift type selection: Hydraulic vs. electric powered
- Accessibility: Ease of boarding and maintenance access
- Durability: Materials resistant to corrosion and marine growth
Step 3: Permitting and Regulations
Permitting is often mandatory before construction begins. Requirements vary by location but often involve:
- Local zoning authorities
- Marine regulatory boards
- Environmental protection agencies
Permits ensure compliance with shoreline regulations and protect against fines or forced removal.
Step 4: Foundation and Piling Work
The foundation provides structural stability. Depending on water depth and soil type, installation may involve:
- Driven pilings anchored deep into the seabed
- Concrete footings for stability in rocky or sandy bottoms
- Floating dock anchors for floating lift systems
Proper piling installation is critical to ensure the lift withstands environmental stresses.
Step 5: Lift Assembly
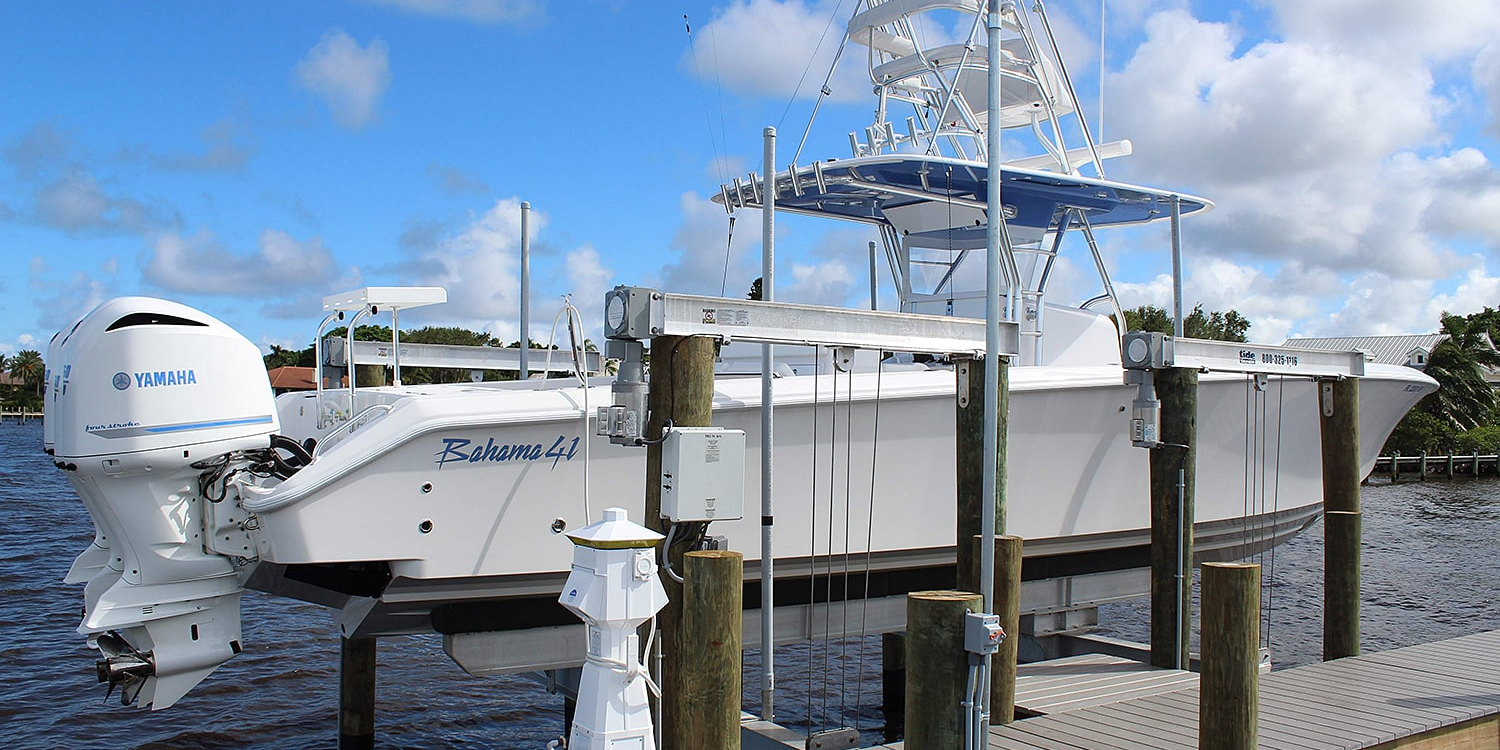
Once the foundation is set, contractors assemble the boat lift structure.
Steps typically include:
- Attaching support beams and cross members
- Installing cradle arms or bunks to fit the boat hull
- Adding rollers, guides, and brackets
- Ensuring structural alignment
At this point, the lift begins to take shape and resemble its final form.
Step 6: Electrical and Mechanical Connections
Depending on the lift type, this phase may involve:
- Hydraulic system setup (hoses, pumps, reservoirs)
- Electric motor installation (wired or solar powered)
- Wiring connections using marine grade components
- Control panels for operation (wired switches or remote controls)
Safety measures like circuit breakers and waterproof housings are also installed at this stage.
Step 7: Safety Checks
Before testing, contractors perform a safety inspection:
- Ensuring all bolts and fasteners are secure
- Verifying electrical wiring and hydraulic lines
- Checking alignment of bunks or cradles
- Inspecting pilings and dock connections for stability
This step reduces the risk of malfunctions during operation.
Step 8: Testing Procedures
Once the lift is assembled and inspected, testing begins.
- Initial dry run: Operating the lift without the boat
- Load test: Lifting the boat under controlled conditions
- Adjustment phase: Aligning bunks, guides, and controls for smooth operation
- Final inspection: Ensuring compliance with safety and performance standards
Step 9: Project Completion and Handover
After testing, contractors hand over the lift to the client, often including:
- Operational training on proper use and weight limits
- Maintenance guidance for lubrication, cleaning, and inspections
- Warranty and service documentation
Timeline and Cost Estimation
| Installation Phase | Timeline (Approx.) | Cost Impact |
|---|---|---|
| Site Assessment | 1 to 2 weeks | Low |
| Design Planning | 1 to 2 weeks | Moderate |
| Permitting | 1 to 3 months | Moderate |
| Foundation & Piling Work | 2 to 4 weeks | High |
| Lift Assembly | 1 to 2 weeks | High |
| Electrical Connections | 1 to 2 weeks | Moderate |
| Safety Checks & Testing | 1 week | Low |
| Total Project | 3 to 6 months | $5,000 to $25,000+ depending on lift type, site, and boat size |
Maintenance After Installation
Proper installation is only part of the equation. Ongoing maintenance includes:
- Lubricating moving parts regularly
- Inspecting cables, pulleys, and hydraulics
- Cleaning marine growth from submerged components
- Checking electrical systems for corrosion or wear
- Scheduling professional inspections every 1 to 2 years
FAQs: Boat Lift Installation
1. How is a boat lift installed step by step?
The process includes site assessment, design planning, permitting, piling installation, lift assembly, electrical work, safety checks, and testing.
2. How long does it take to install a boat lift?
Most installations take 3 to 6 months, with permitting often being the longest stage.
3. Do I need a permit for a boat lift?
In most regions, yes. Permits are required to comply with environmental and zoning laws.
4. What’s the average cost of boat lift installation?
Costs range from $5,000 to $25,000+, depending on size, type, and site conditions.
5. Can a boat lift be installed on any dock?
Not all docks are suitable. The dock must be structurally capable of supporting the lift, or pilings may need to be installed separately.
6. What type of boat lift is best?
It depends on water depth, boat size, and dock structure. Hydraulic lifts are durable and powerful, while floating lifts are ideal for fluctuating water levels.
7. Is professional installation necessary?
Yes, due to safety, electrical, and structural requirements, professional installation is strongly recommended.
Conclusion
Installing a boat lift involves careful planning, regulatory compliance, and expert execution. From site assessment to testing procedures, each step plays a vital role in ensuring long term safety and performance.
For clients, understanding the boat lift installation steps provides clarity on what to expect in terms of timeline, costs, and ongoing maintenance. For contractors, following this structured process ensures high quality, reliable installations that meet both client expectations and regulatory standards.
At Coast Seawall Dock & Boatlifts, we specialize in delivering professional boat lift installations backed by experience, precision, and a commitment to excellence. Whether you’re a homeowner or contractor, our team ensures that every project is built to last and tailored to your specific waterfront needs.


